Acne is an obsession and an irritant to so many people. Many people defy skin damage, determined to “eliminate” them by prying acne themselves. However, there are also people who want to “get rid” of acne from the skin but are afraid to leave scars. Is there a way to make acne that doesn’t leave scarred? This is also a question that gets a lot of attention. Self-inflicted acne is not recommended. But don’t worry, in the article below, Spa Rose will show you the secret to molding acne properly without leaving scars.
First, let’s find out what it’s like to do the right thing.
The harmful effects of improper acne
As you know, improperly molding acne will have unpredictable consequences:
- Breaking down skin structure
- Increase the amount of harmful bacteria on the skin
- The acne socket breaks down and spreads under the deeper layers of the skin
- The condition of acne is getting worse.
- Leave pitted scars and acne bruises
How to properly mold acne
Taking the medical standard acne nucleus is called molding acne the right guest. Remove the acne nucleus when the acne has “ripened” gently, You will use specialized sterilized acne removal tools. In addition, when removing acne, it is necessary to comply with the principles of hygiene, sterilization, medical approval,… Taking acne properly will minimize damage on the skin and prevent dark spots, pitted scars.
What’s the effect of molding acne properly?
If you mold the acne properly, you will get many benefits:
- Helps to cleanse the skin. Acneis a collection of excess sebum, dirt, dead cells, microorganisms, … When they are removed, their skin becomes cleaner.
- Improves the surface of the skin. Pimples on your face will make your skin lumpy and rough. But this feeling will disappear as soon as the pimple nucleus is removed.
- The pores are ventilated, preventing the formation of acne. The acne nucleus located in the skin will cause the pores to be secretive, uncomfortable. When they are removed, the pores will be “free”.
- Prevent the spread, inflammation. Acne patients if left for a long time and treated improperly. They will become more inflamed and spread to the surrounding area.
- Absorb nutrients better. When the skin is cleaned, the acne nucleus has been removed, the surface of the skin is ventilated. This will help to absorb nutrients more efficiently.
Some principles of proper acne molding
Before molding the acne ourselves, we need to carefully study the notes when molding. Because if you just do it a little wrong, your face will have unpredictable consequences.

Some of the following correct acne-making principles that you must adhere to:
- Only take non-inflammatory acne kernels and be collected: If intentionally molding the types of acne that have not gathered or are red inflammation. You will accidentally damage the skin structure, creating conditions for bacterial nests to penetrate. From there, the broken tissues pose a high risk of pitting scars.
- Get the acne nucleus in accordance with the medical procedure: The procedure for obtaining acne kernels must be correct. Before molding the acne must rush the face so that the pores are dilated. Therefore, the pimples will be removed easily. Note, it is necessary to clean the acne treatment tools.
- Use moderate force: When molding pimples avoid strong pressure or rough operations, this will damage the skin structure and leave scars.
- Antiseptic acne tools: It is not recommended to take acne kernels with sharp objects. Reusable acne fillings need to be thoroughly disinfected.
- Fully prepare products to support the acne molding process: Before taking acne kernels, it is necessary to prepare tools, antiseptic products, cleaning products, soothe the skin and reduce swelling, restore the skin …
Getting the acne nucleus will be simpler if you follow the rules of molding acne properly above. You should also “memorize” the principle to avoid errors in the molding process next time.
Spa Rose guides proper acne molding at home

Proper acne at home is something that a lot of people are interested in. Below, Spa Rose will show you how to properly mold acne at home. The steps taken have been simplified by Spa Rose during the implementation.
Step 1: Prepare acne molding and antiseptic tools thoroughly
Prepare the necessary items and products to carry out the following acne filling:
- Acne filling and cleaning tools: Cotton swabs, makeup remover, medical gloves, Large cotton towels, warm water for steaming
- Cleaning products: Cleanser (recommended: Papulex Moussant, A-derma, Ducray Keracnyl Foaming Gel); Makeup remover (hint: Bioderma depending on skin type); Toner; moisturizing (hint: HA Plus, PHA).
- Antiseptic, exfoliating products: Povidine, Physiological Saline, PHA Solution
Step 2: Cleanse the skin and remove makeup
- Use cotton makeup remover and absorb makeup remover to remove the make-up layer; sunscreen (in case of use) cleans the skin.
- Washing your face: Use a cleanser suitable for the skin to remove dirt, sebum
- Exfoliate the skin to remove the horns and toxins on the skin.
Step 3 Heat in about 3 minutes
Storm the surface with warm water. Use a cotton towel over your head so that the warmth doesn’t get out. Face on a warm water bowl with a distance of 30 cm. Heating dilates the pores, loosening the cuffs of the acne nucleus. Acne kernels are easily removed without strong impact, while limiting skin damage.
Step 4: Disinfection before taking acne
Use physiological saline or Povidine soaked with cotton remover and disinfect the whole face, helping to prevent harmful bacteria.
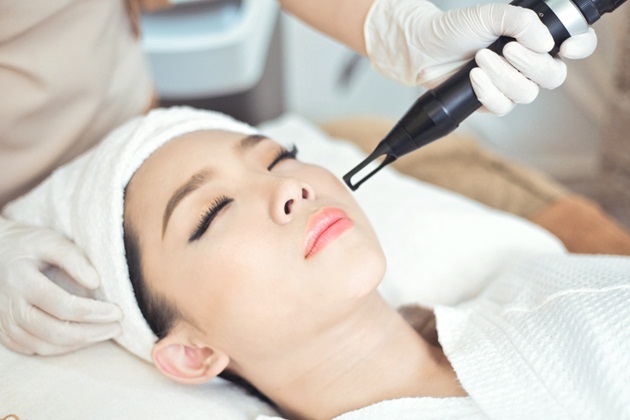
Step 5: Take the acne nucleus with a cotton swab
Wear a medical glove and use a cotton swab to get the acne kernels that have gathered the buds. The operation should be gentle and careful, not strongly affect the skin.
Note only the types of acne that are allowed to be taken. Do not be greedy for inflamed pimples.
Step 6: Disinfection after acne removal
Disinfecting open wounds with povidine and salt water helps prevent harmful bacteria.
Step 7: Clean the skin
Clean the skin with water usually gently.
Step 8 Apply toner
Applying toner helps to soothe, balance skin pH and enhance moisture for healthy skin.
Use cotton remover to absorb toner and light miles on the newly molded acne lesions. Note not to rub closely to avoid injury.
Step 9 Moisturizing
Apply HA serum to the skin to provide moisture to the skin, skin care helps the skin always be glossy and smooth.
You need to definitely apply the correct 9 steps to mold the above medically approved acne. Follow the correct rules when molding acne. Along with that, take care of the skin thoroughly and properly at home. You will achieve your wishes. However, it is not recommended to abuse the molding of acne but only mold with reasonable frequency.
Note
The medical standard acne molding procedure above will not have a substitute for a skin examination with a dermatologist. Therefore, in order to be safe and effective, you should see a dermatologist for thorough treatment. There, the doctor will apply advanced technology in the process of acne treatment. Your condition will improve without worrying about anything.